How to Add Your API Key to AutoexPlain AI Reader | Step-by-Step Guide
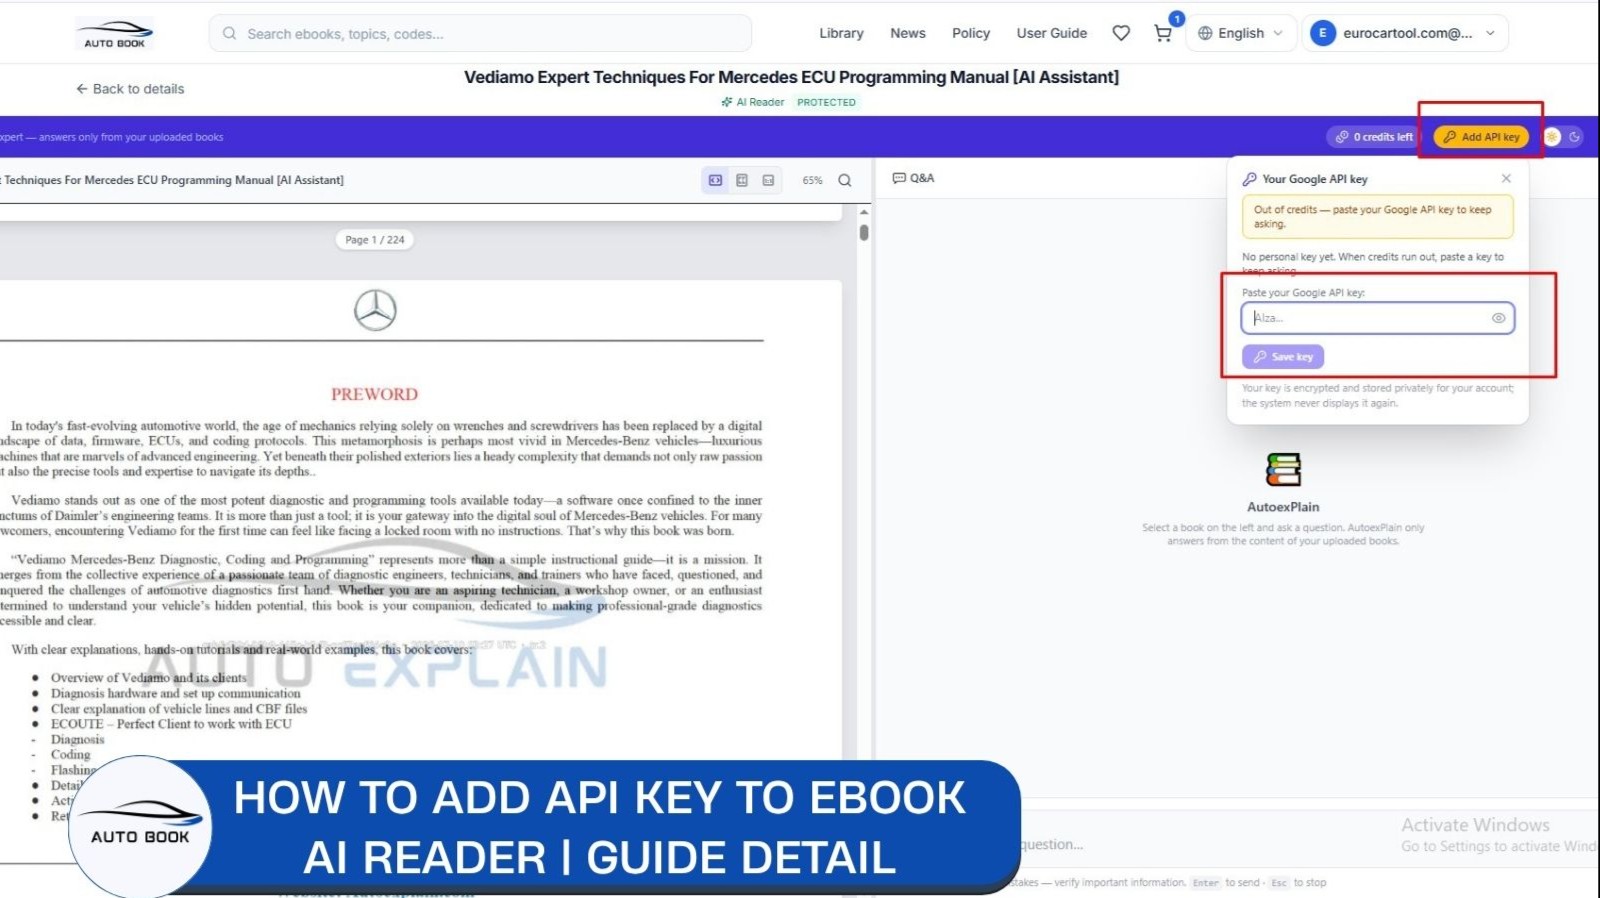
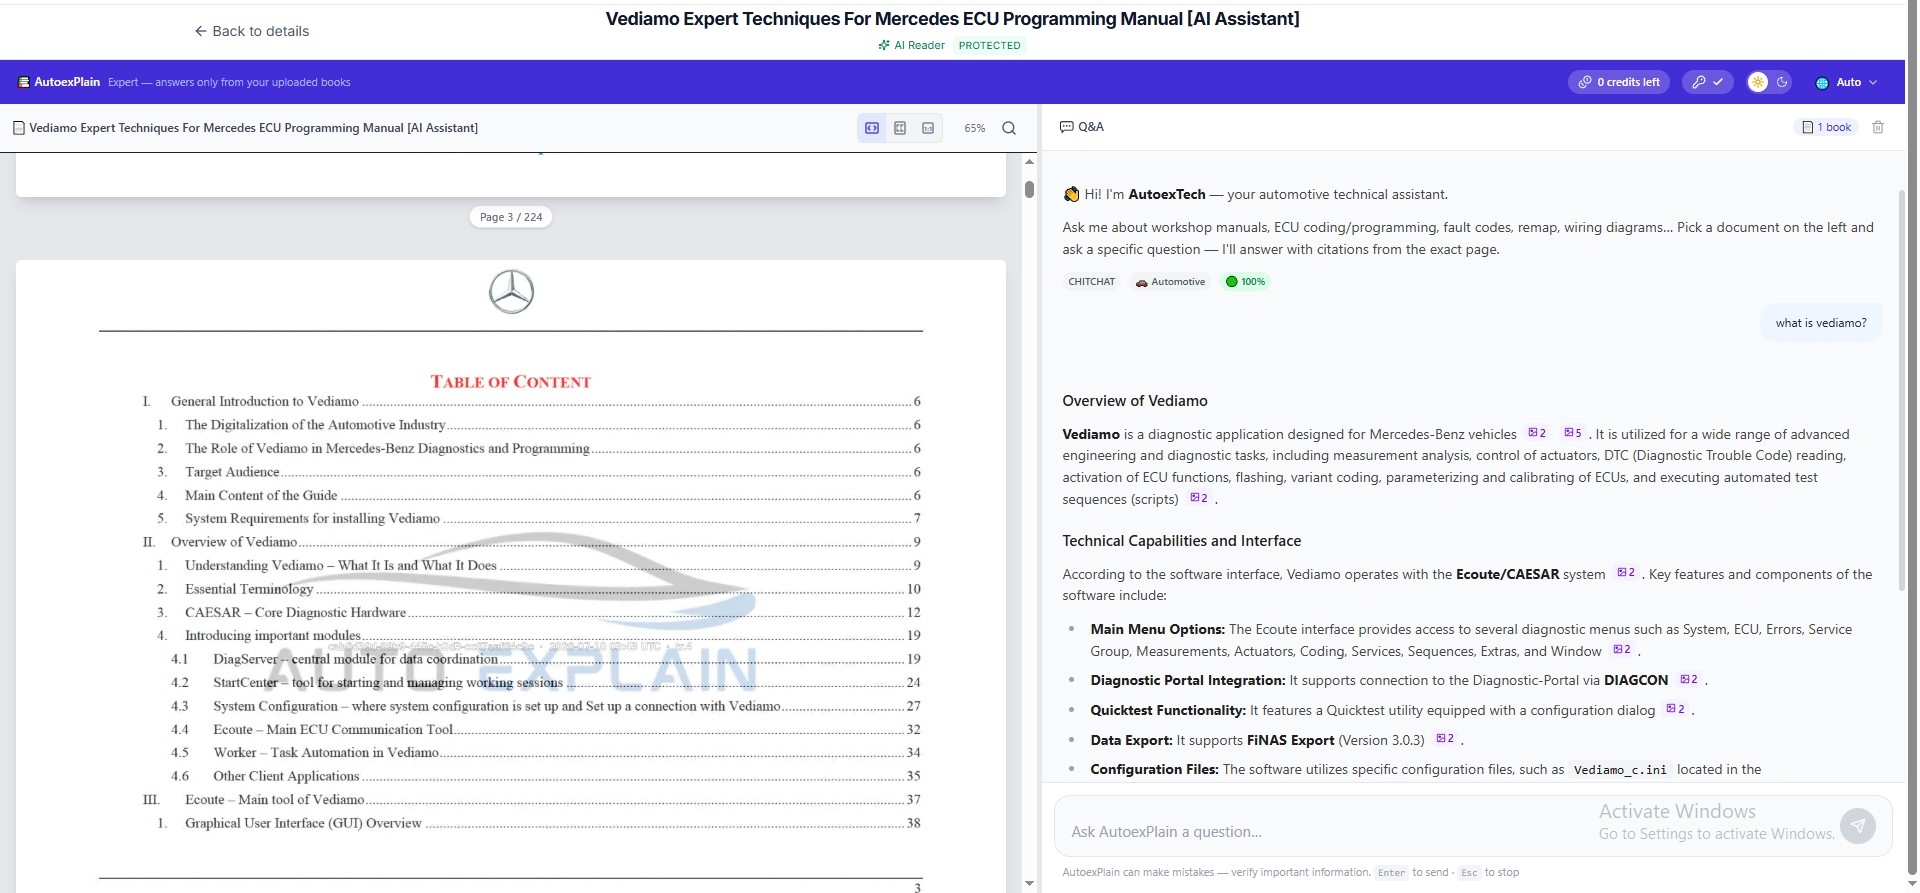
When you purchase an ebook on AutoExplain, 10% of your order value is automatically converted into AI credits, which power the AI Reader/Assistant feature so you can ask questions directly from your book.
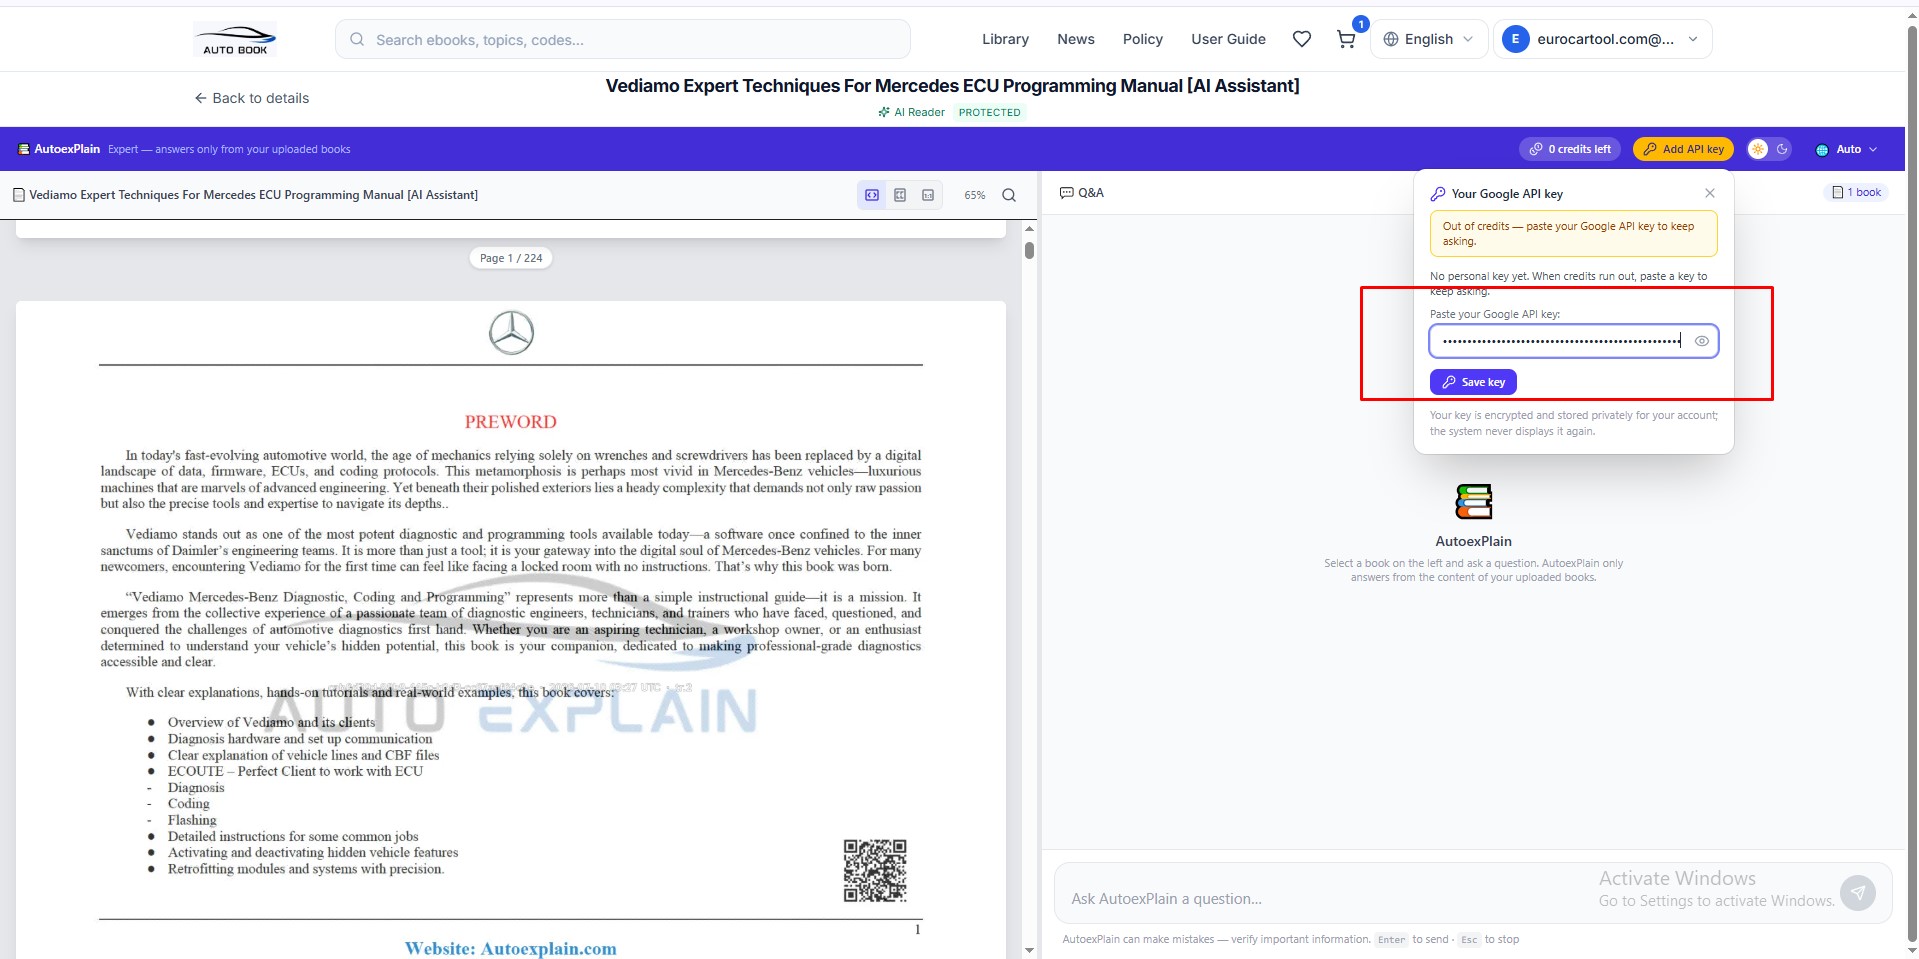
Once those free credits run out, you'll see a message like:
"Out of credits — paste your Google API key to keep asking."
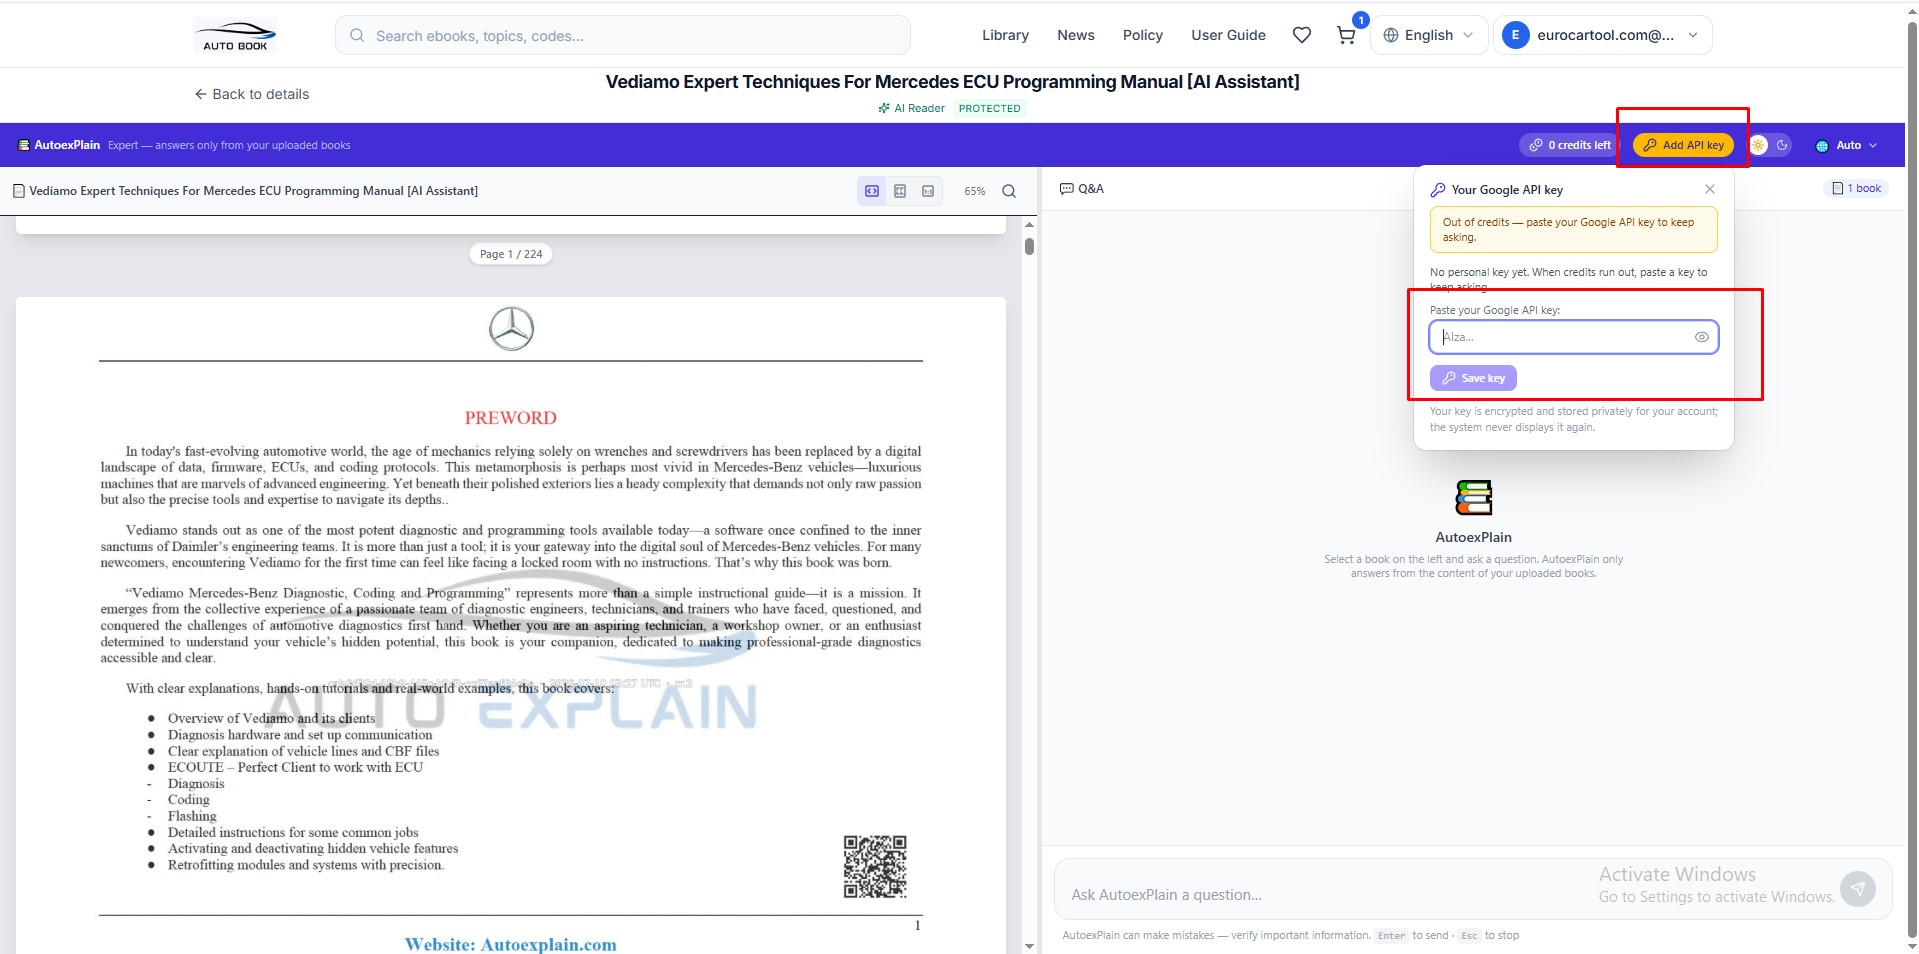
Don't worry — this doesn't mean you're locked out. You can simply connect your own free Google API key and continue using the AI Assistant at no extra cost (Google's free tier includes generous daily limits). Here's exactly how to do it.
How to Add Your Own Google API Key to AutoexPlain
Step 1: Go to Google AI Studio
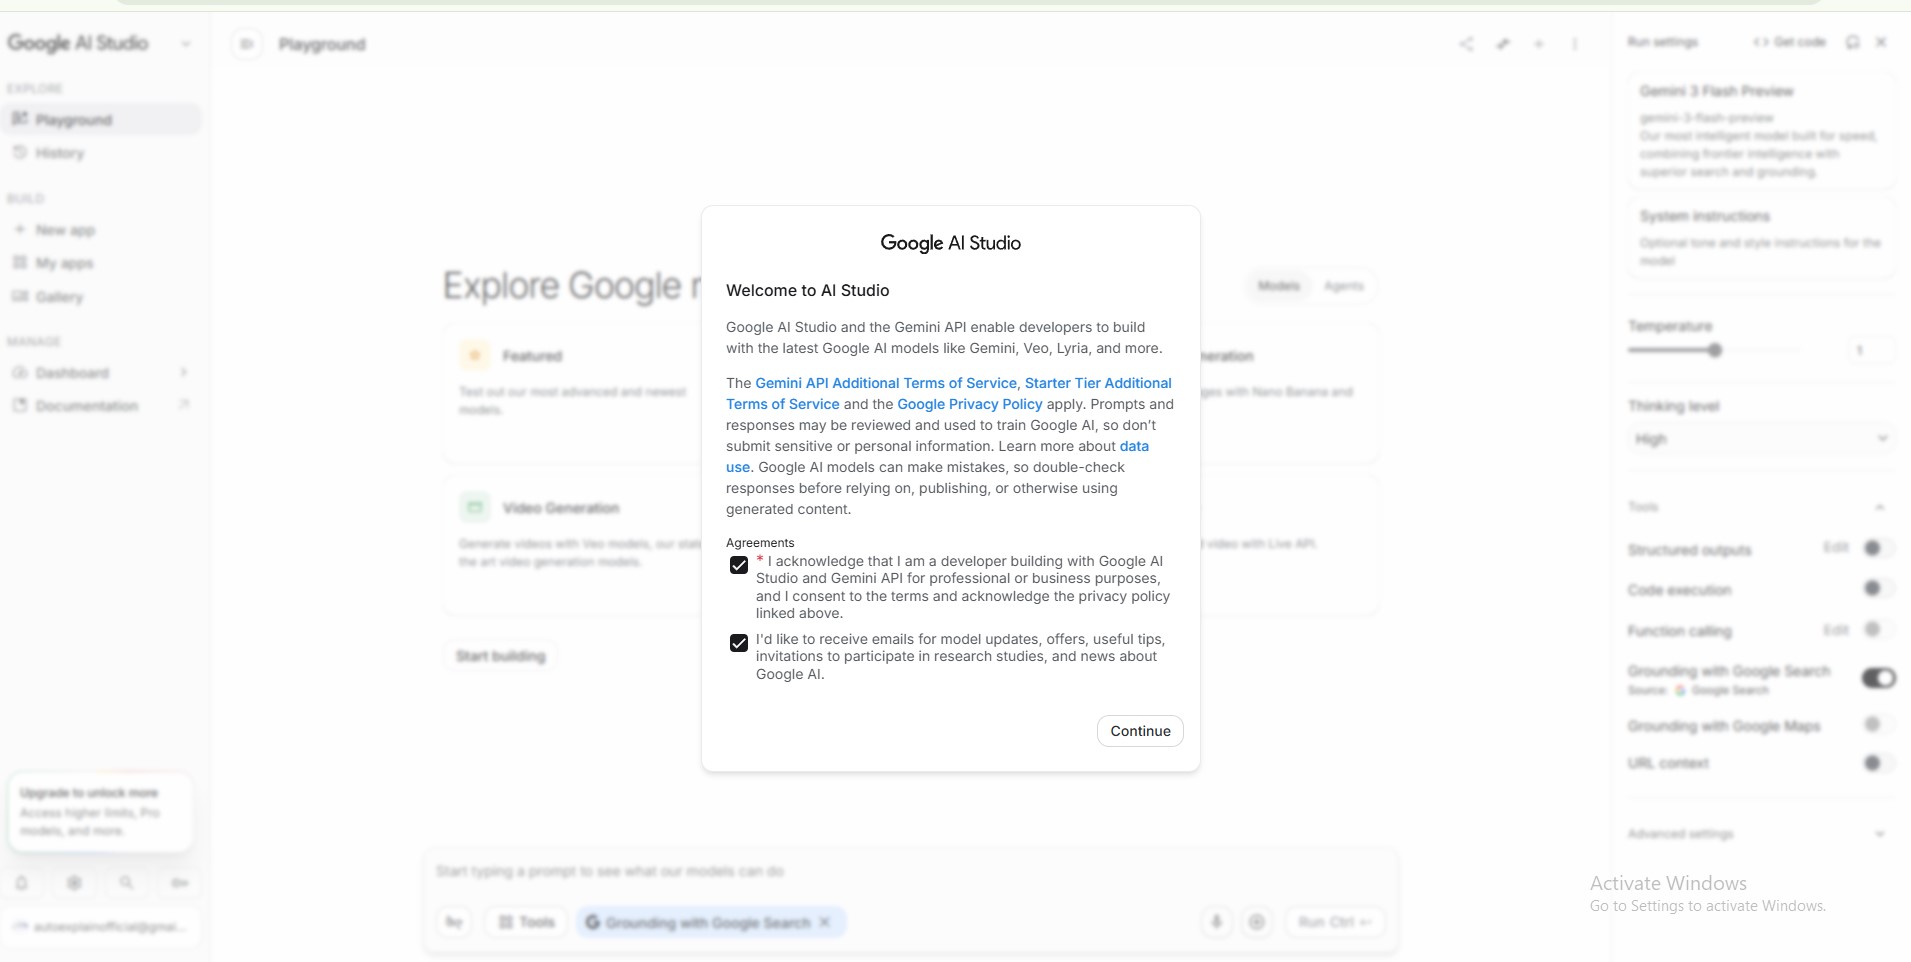
Open aistudio.google.com and sign in with your Google account.
If it's your first time, you'll see a Welcome to AI Studio dialog. Check the required agreement box and click Continue.
Step 2: Open the API Keys Section
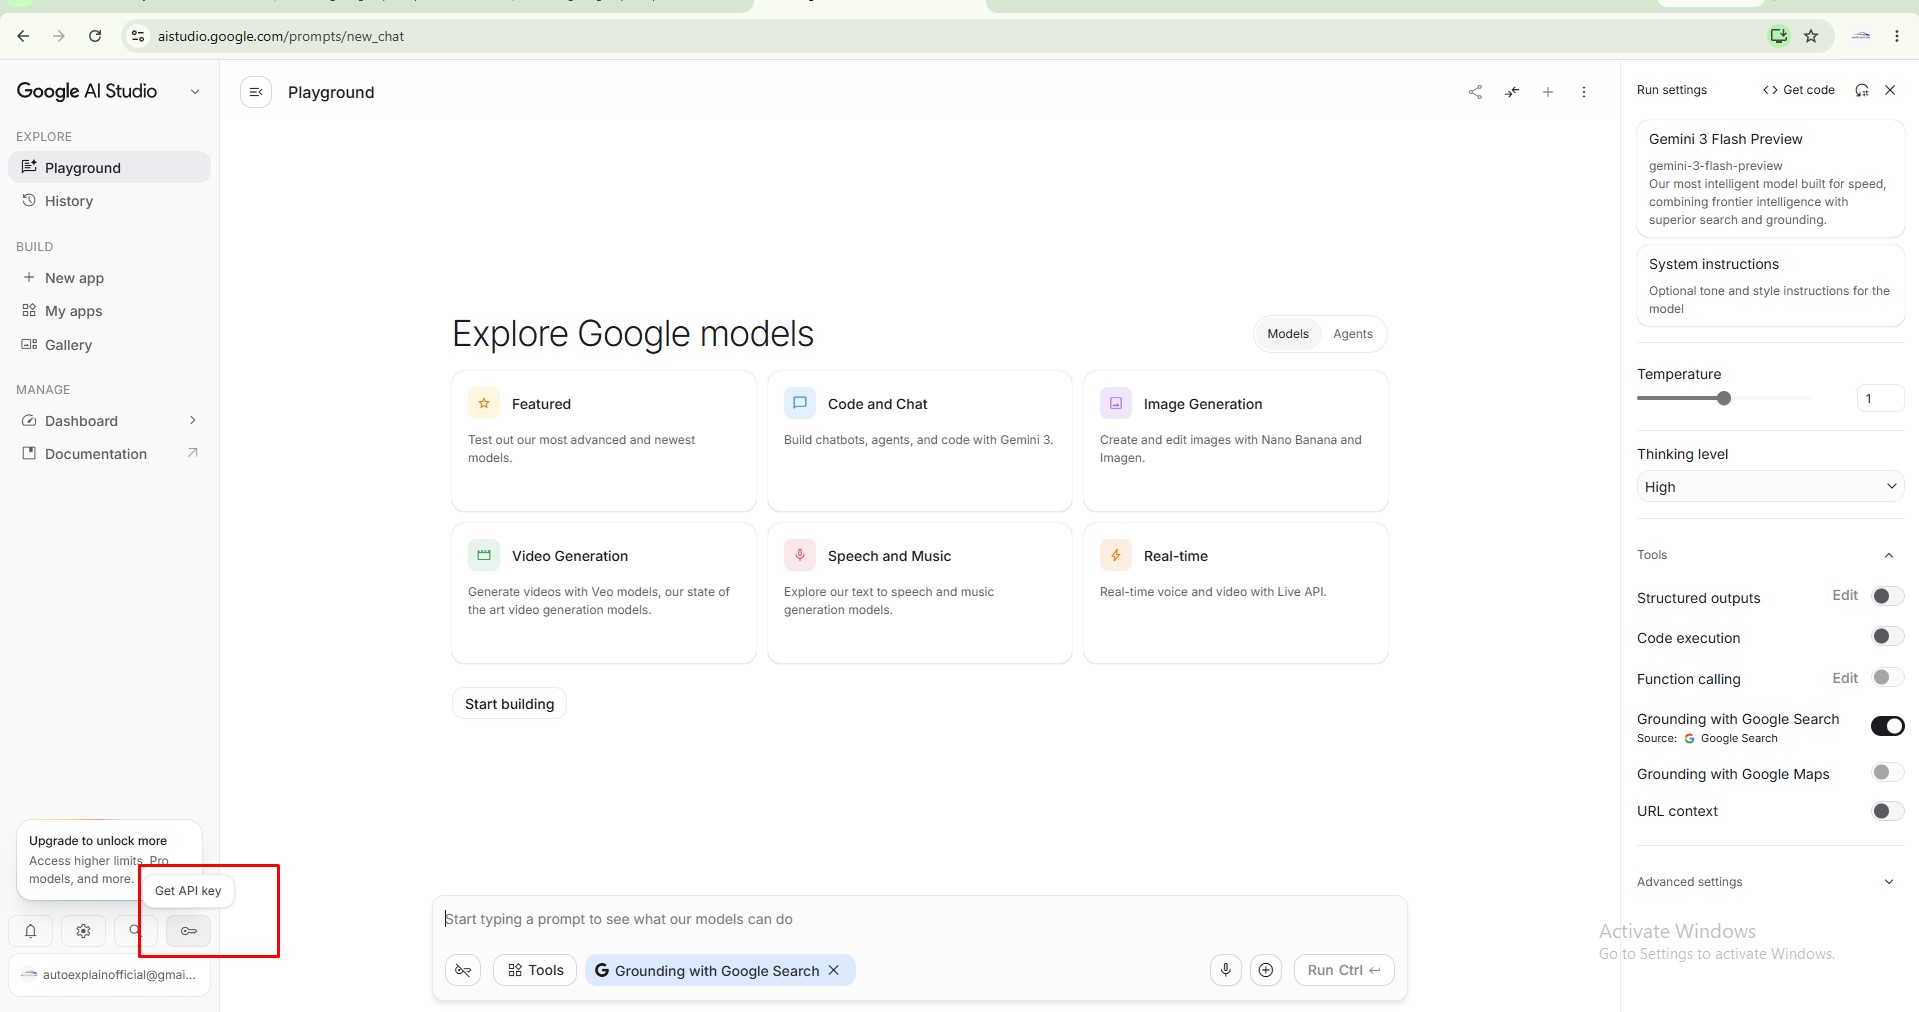
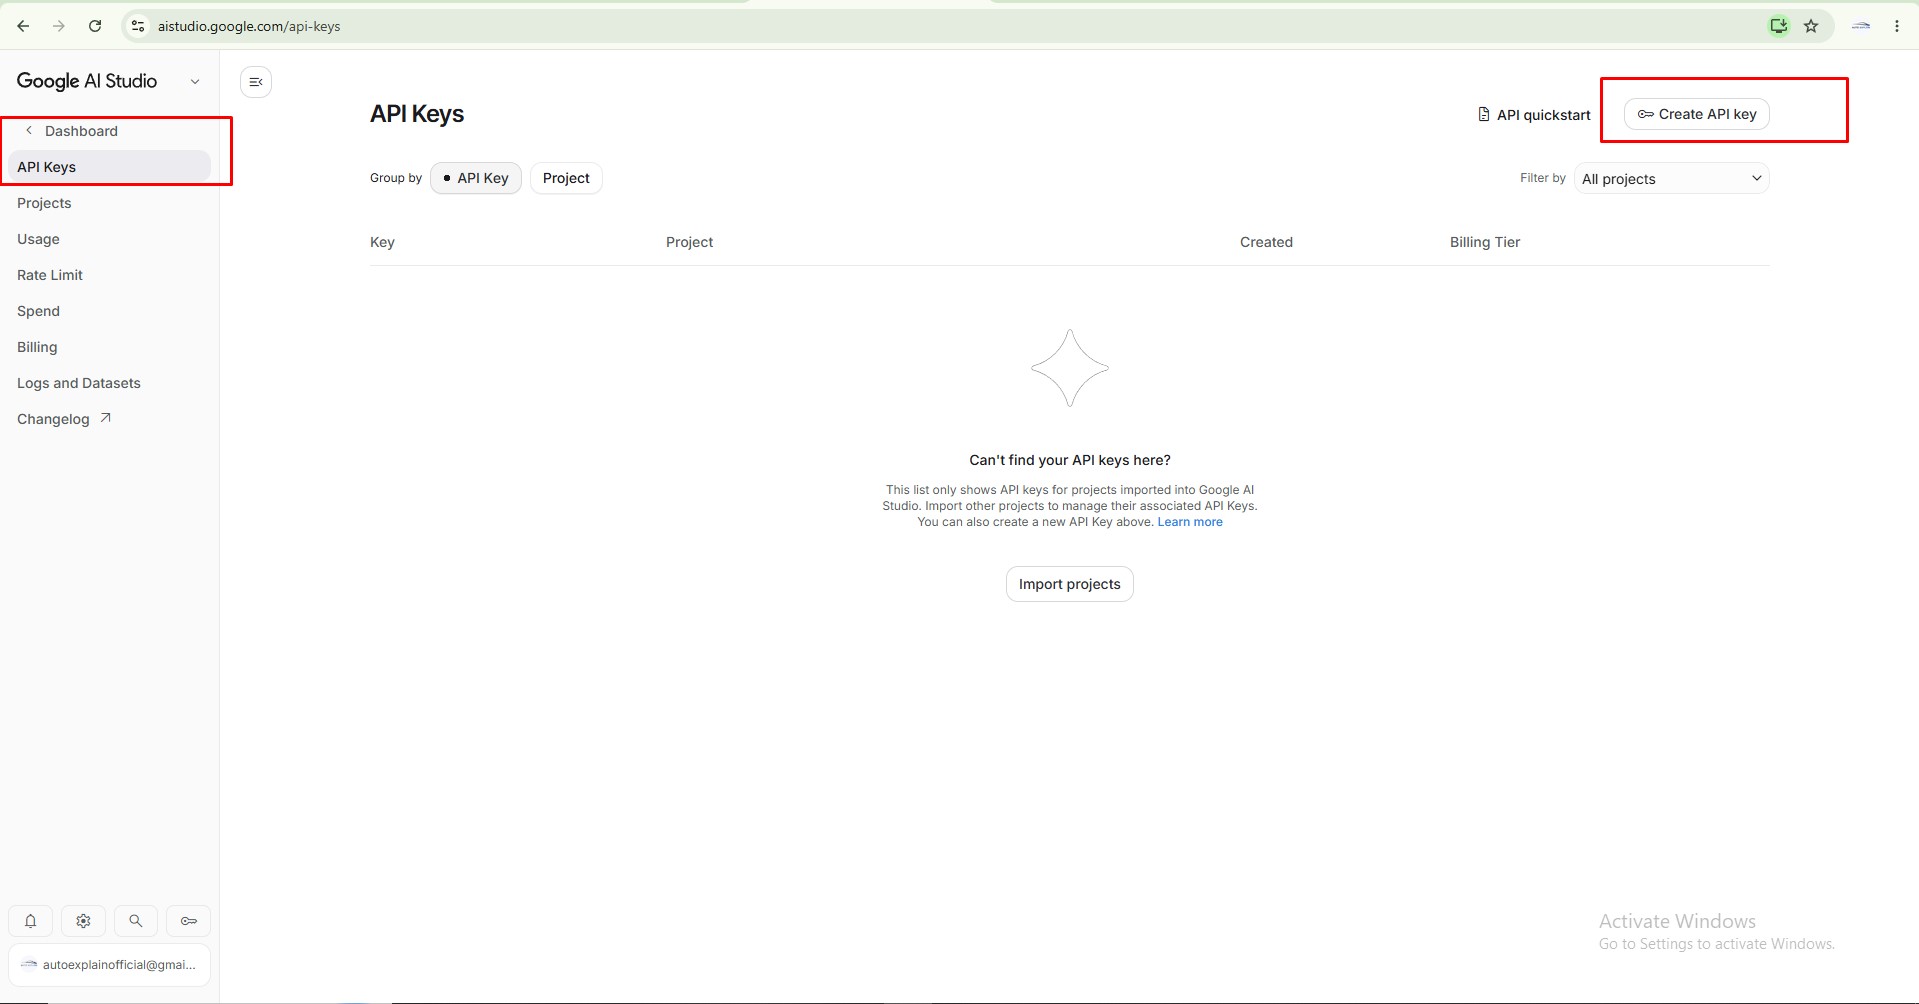
From the Playground screen, look at the bottom-left corner of the sidebar and click Get API key.
This will take you to the API Keys page. If you don't have any keys yet, you'll see a message: "Can't find your API keys here?" — this simply means no key has been created for your account yet.
Step 3: Create a New API Key
Click the Create API key button in the top-right corner.
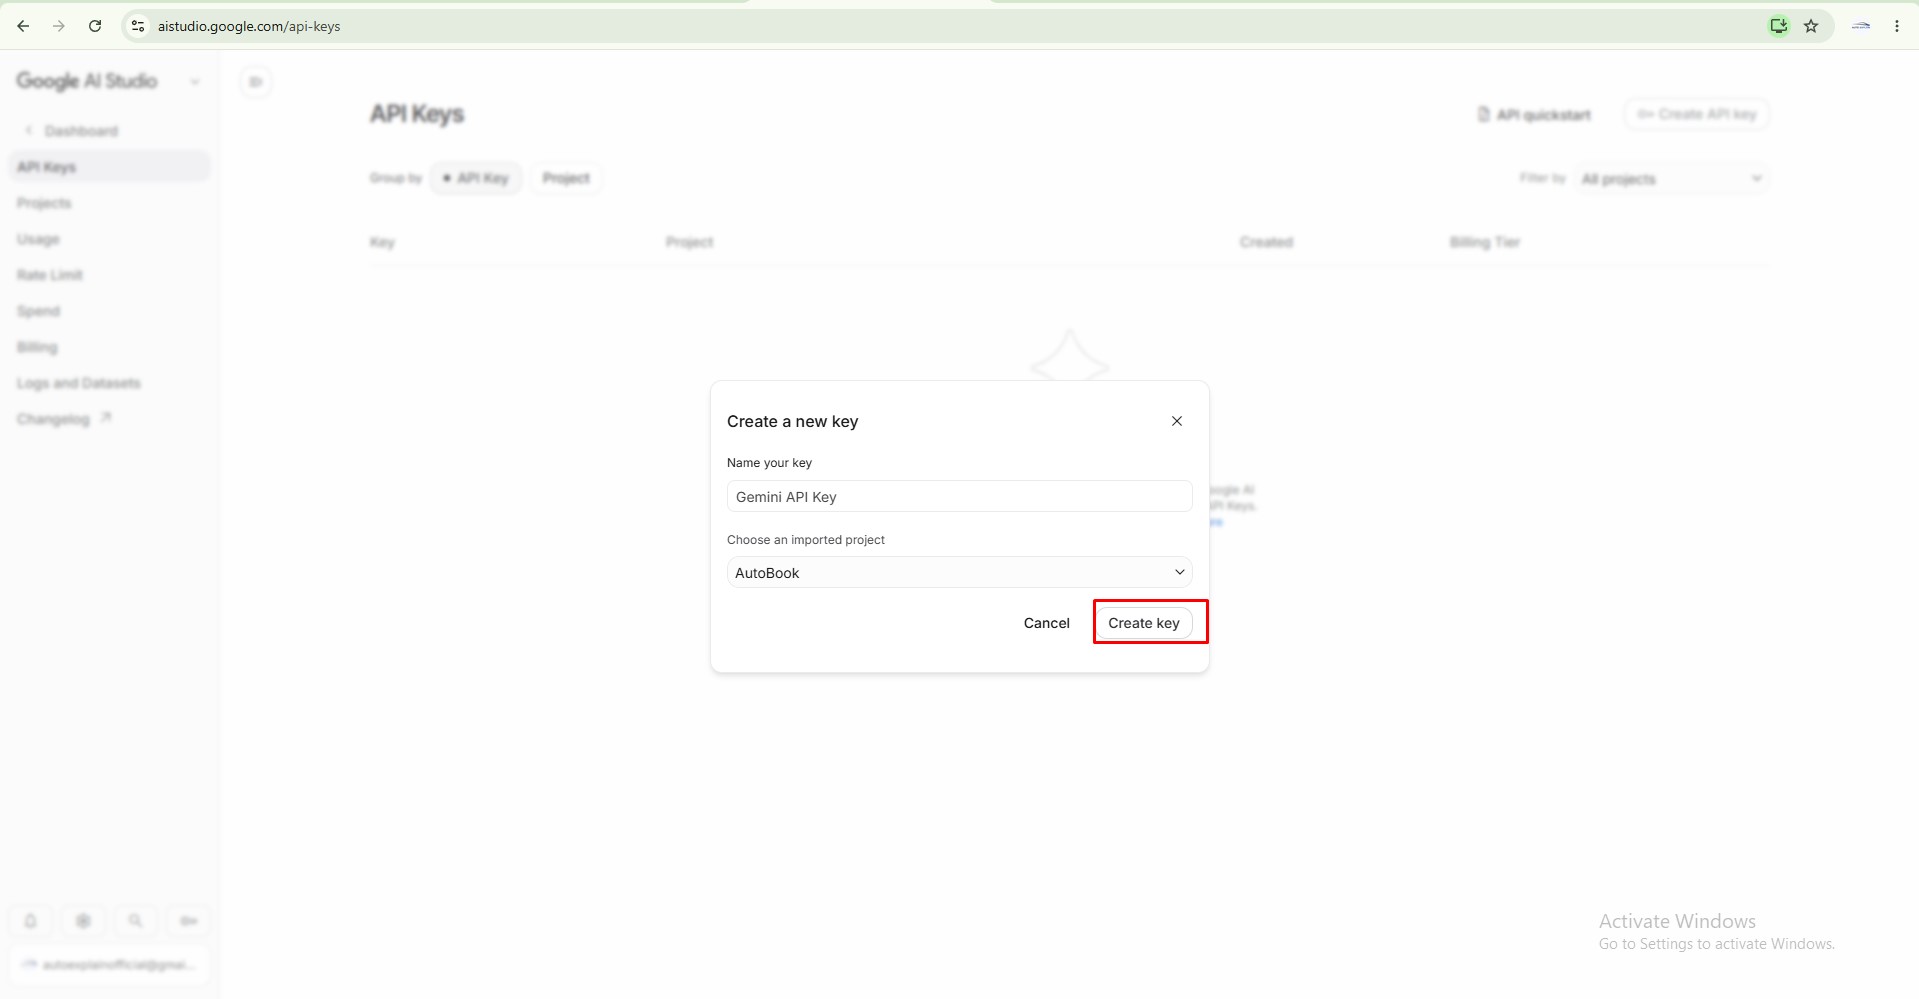
In the Create a new key popup:
- Give your key a name (or keep the default, e.g., "Gemini API Key")
- Choose a project from the dropdown (e.g., "AutoBook") — or create a new one
- Click Create key
Step 4: Copy Your API Key
- Once created, a popup will show your API key details, including the full key string.
- Click the copy icon next to the key to copy it to your clipboard.
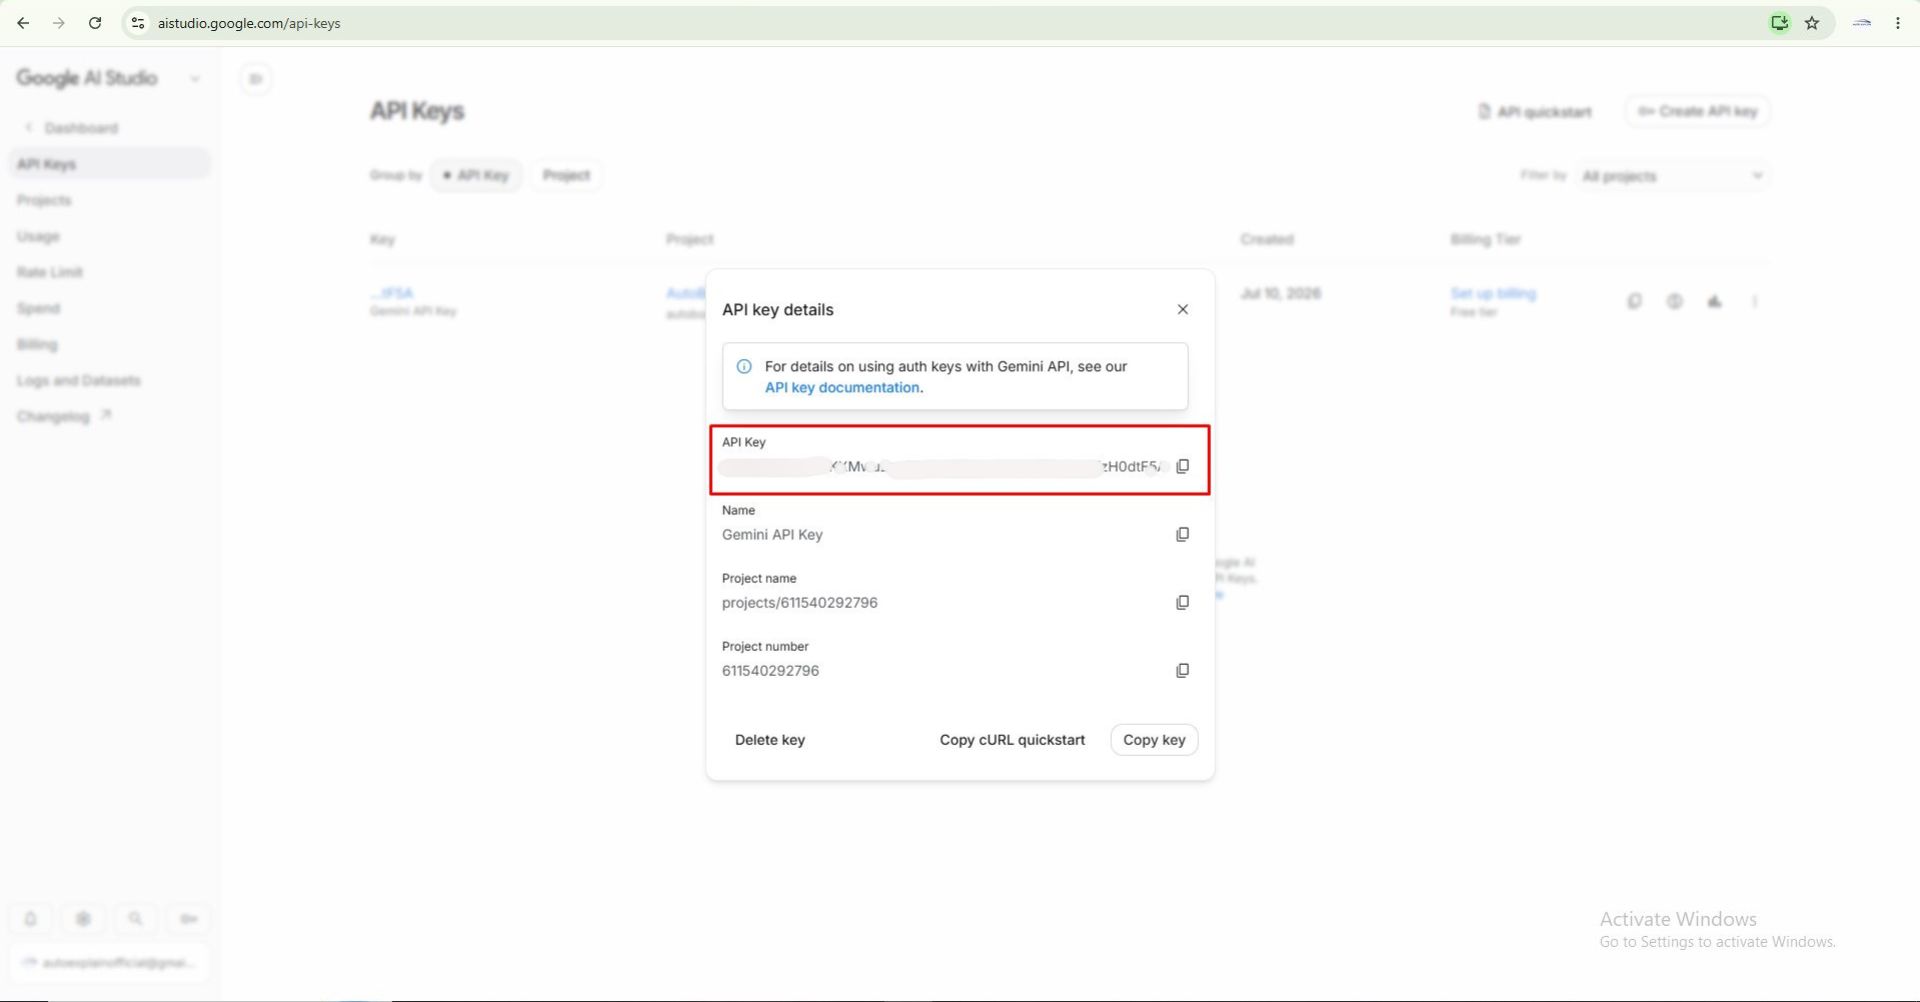
Important: This key is only shown once. Make sure to copy and store it somewhere safe — Google will not display the full key again.
Step 5: Paste the Key into AutoexPlain
Go back to your book on ebook.autoexplain.com and open the AI Reader / AutoexPlain Assistant panel.
- Click the Add API key button (top-right of the AI Assistant bar)
- In the Your Google API key popup, paste the key you copied into the "Paste your Google API key" field
- Click Save key
That's it! Your key is encrypted and stored privately for your account — the system will never display it again, and only you can use it.
Step 6: Keep Using the AI Assistant
Once saved, you can continue asking AutoexPlain questions about your book without interruption, powered by your own Google API key instead of AutoexPlain's shared credits.
Notes
- Google's Gemini API free tier is generous enough for most personal use (see rate limits at aistudio.google.com/rate-limit).
- If you ever hit Google's free-tier limits, you can upgrade by clicking Set up billing on the same dashboard.
- Your API key is tied to your own Google account — AutoexPlain never has access to your Google billing or personal data.
How to Check Your API Key Usage
To monitor how much of your Gemini API quota you've used, follow these steps:
- Go to Google AI Studio → aistudio.google.com
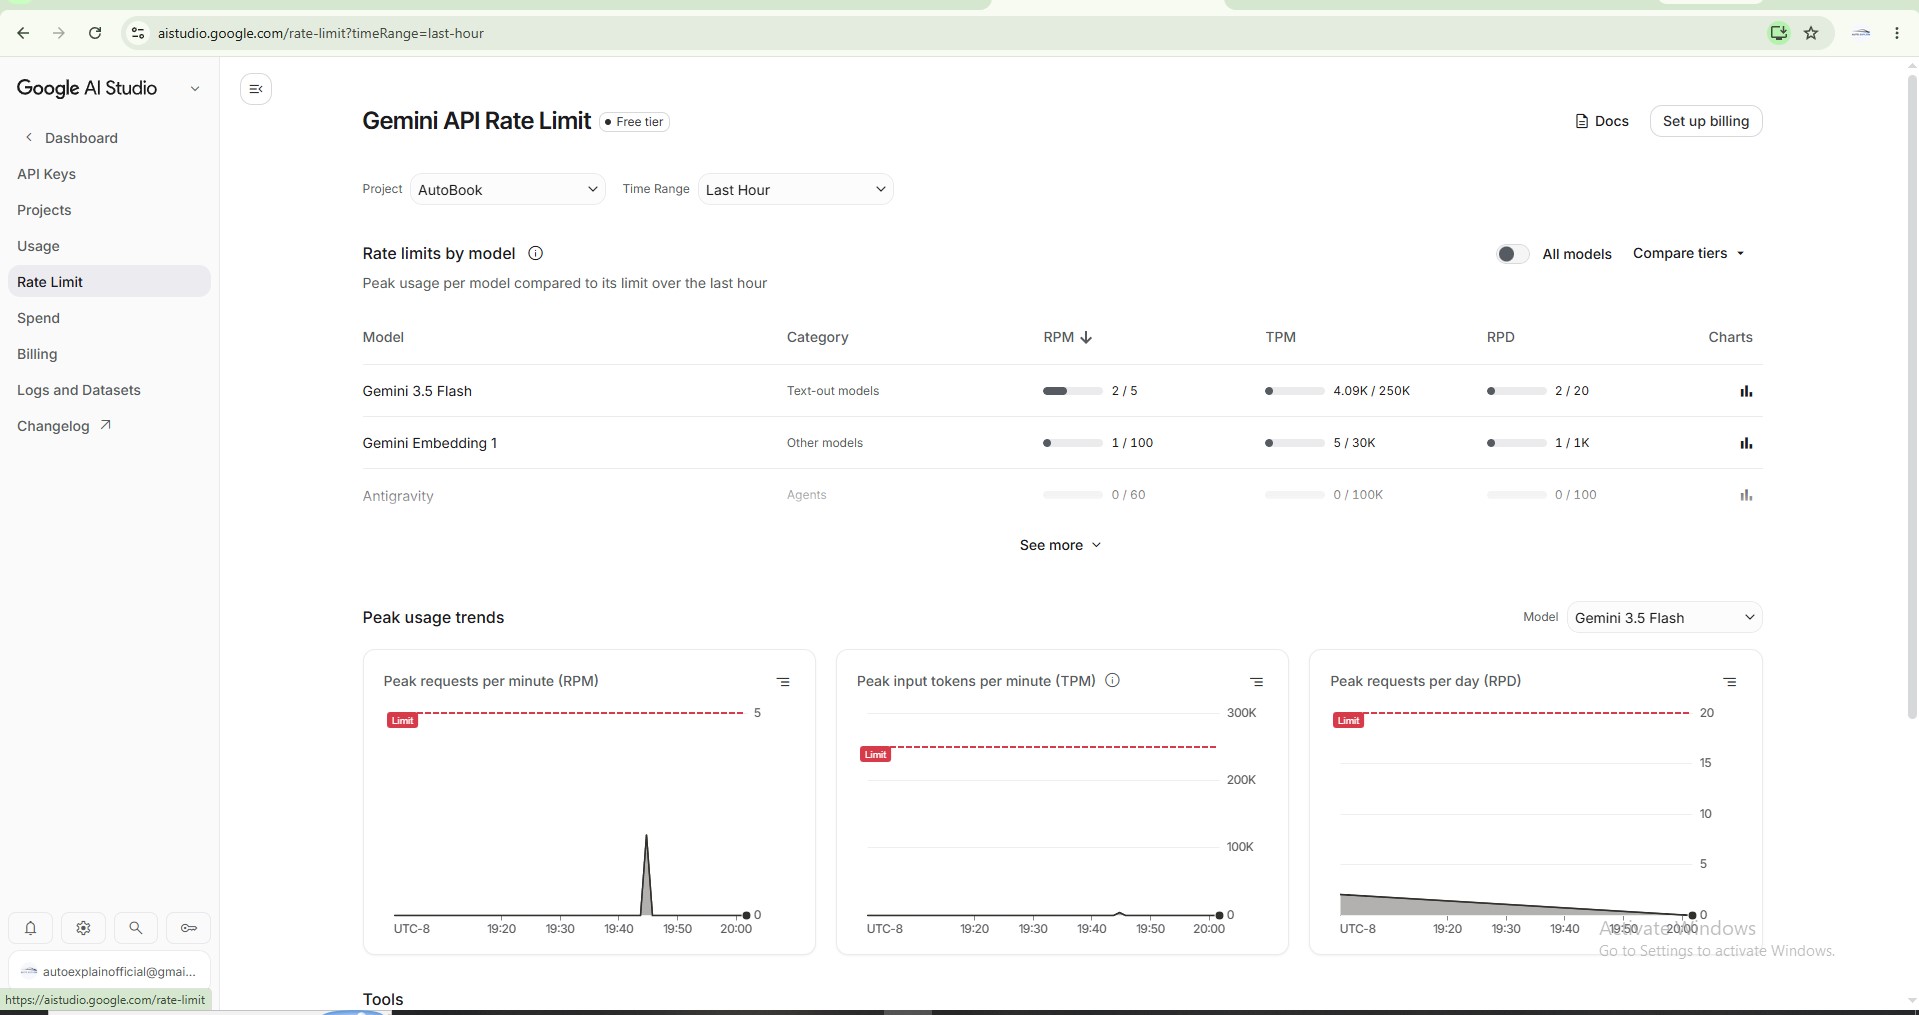
- In the left sidebar, click Rate Limit
- At the top, select the Project associated with your API key (if you manage multiple projects)
- Choose a Time Range (e.g., Today, 7 Days, 28 Days) to view usage over that period
You'll see a table listing all available models, with three key metrics for each:
- RPM (Requests Per Minute) — how many requests you've sent per minute vs. the allowed limit
- TPM (Tokens Per Minute) — how many tokens processed per minute vs. the allowed limit
- RPD (Requests Per Day) — total requests sent today vs. the daily limit
Each row shows this as used / limit (e.g., 2 / 5 means you've used 2 out of a 5-request limit). Click the chart icon on the right of any row to view detailed usage trends over time for that specific model.
For a broader view, you can also check:
- Usage — visual charts of your API consumption across all models
- Spend — your billing costs (if billing is enabled)
How to Upgrade Your Plan
If you're hitting rate limits frequently on the Free tier, you can upgrade to increase your quotas:
- On the Rate Limit page, click Set up billing in the top-right corner
- Follow the prompts to link a billing account (via Google Cloud)
- Once billing is active, your rate limits (RPM, TPM, RPD) will automatically increase based on the paid tier
You can compare tier limits before upgrading by clicking Compare tiers next to the "All models" toggle on the Rate Limit page — this shows exactly how much more quota you'll get on the paid tier for each model.
If you run into any issues while adding your API key or have questions about your AI credits, our team is here to help.
- WhatsApp Us: +1 (936) 289-6695
- Email: [email protected]
We're happy to walk you through the setup or troubleshoot any errors you encounter.
Explore More Ebooks at: https://ebook.autoexplain.com/library